Introduction tutorials
This section present some examples of how to use gazebo simulator and ROS in order to play with the robot and develop some extensions.
This tutorials assume you have already installed and tested project, see installation page for more details.
Getting started
You can run the test demo by typing in a command window:
cd ~/catkin_ws
source devel/setup.bash
roslaunch education_robotics demo_robot_simple.launch
This demo (demo_robot_simple.launch) shows a simple example of how ROS interface with gazebo.
The demo is composed by the following nodes (processes):
- robot_move_example: A python scripts that send command velocities for robot (/robot/cmd_vel), placed on: education_robotics/src/robot_move_example.py
- gazebo: Simulator: shows and moves the robot
Now we can check how this nodes are connected using Node graph:
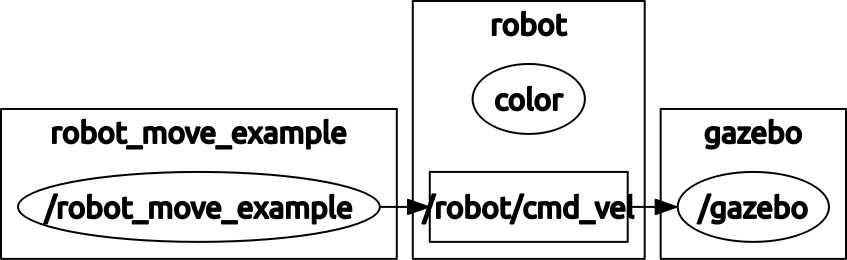
As you can see here, the node robot_move_example: sends the command /robot/cmd_vel to the node gazebo.
Let’s have a look at some parts of robot_move_example.py script:
- The first part of the code creates a new ROS node, a publisher that send command velocities to the robot (self.cmd_vel_pub) and define the update speed (self.rate)
# Init ros node
rospy.init_node('robot_cmd_vel')

# create a publisher for command velocity
self.cmd_vel_pub = rospy.Publisher('/robot/cmd_vel', Twist, queue_size=1)

# define rate of transmission: 10 hz
self.rate = rospy.Rate(10.0)
- Now we create a infinity loop that sends commands to robot using some methods:
while not rospy.is_shutdown():

self.move_forward()
time.sleep(3)

self.rotate_left()
time.sleep(2)

self.stop_robot()
time.sleep(1)
.......
- If we take a look at one of this methods, we can realize that it only changes velocities for linear and angular components, in this case (move_forward), it defines linear component equals to 0.3 and angular = 0 (no rotation):
# move forward robot
def move_forward(self):
    # create Twist message
    cmd = Twist()
    cmd.linear.x = 0.3
    cmd.angular.z = 0.0

    # Send command
    self.cmd_vel_pub.publish(cmd)
You can use this script as a template for new programs in the future.
First task: Make some figures with the robot!
You should program the movement of robot in order to perform some geometrical figures like circles, triangles, squares etc...
We have prepared for you a script with almost everything you need for this task, you can find the script at: education_robotics/src/tutorials/1_basic_figures.py
Please open the file an complete the missing parts:
# send commands at 10 hz
while not rospy.is_shutdown():
    # ---------------------
    # Place your code here:
    # remember you should create a set of figures with the robot
    # if you have problems, you can use robot_move_example.py as a example.

    # circle:

    # triangle:

    # square:

    # others?:

    # ----------------------
Once you have modified the code, you can test it using the following commands:
cd ~/catkin_ws
source devel/setup.bash
roslaunch education_robotics tutorials_test_figures.launch
- You should have something like this:
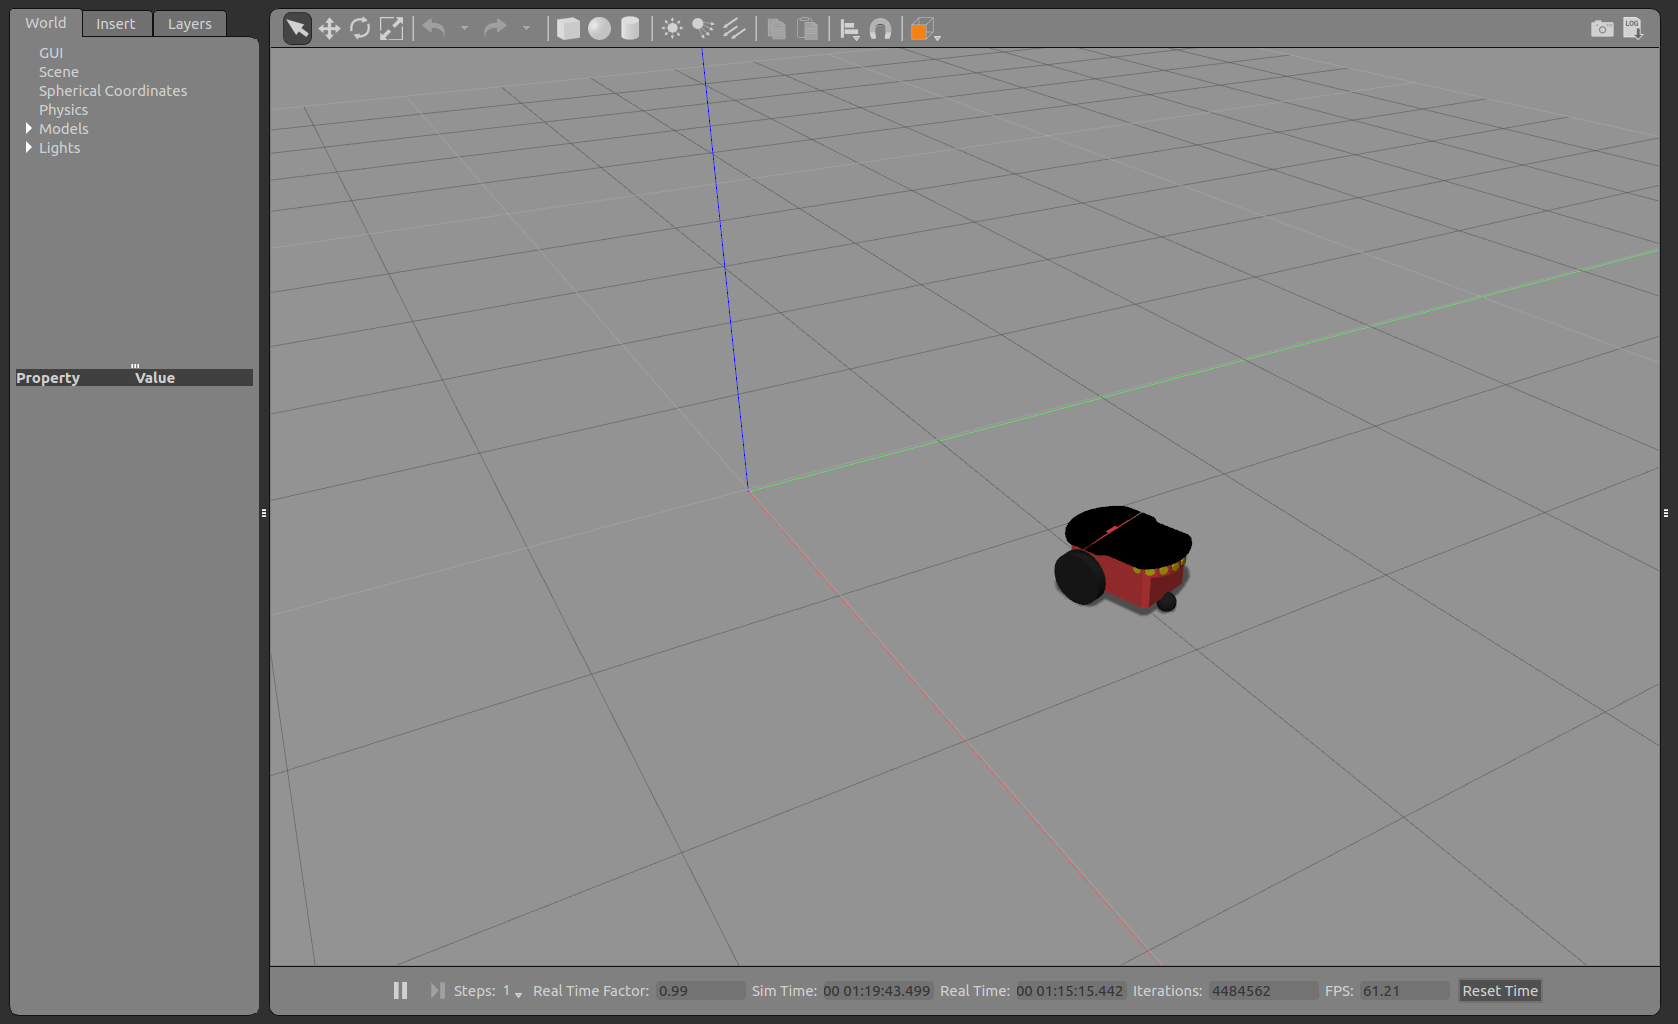
Now you are ready for more challenging tasks, lets check the next section!